認証を持たないウェブアプリケーションをいざ認証に対応させようと思うと案外面倒でモチベーションを無くしてしまうなんて事もよく起きうる話です。特に社内向けのアプリケーションを作っていたら本番で使う事になってしまって、なんて話は良くある話です。開発で本番 DB を見るのはちょっと...。でも既存のコードをゴリゴリと触りたくない。そんな場合にログイン認証部分だけマイクロサービス化できると気持ちも幾分和らぎます。今日はそんなちょっと便利なサーバ「loginsrv」を紹介したいと思います。
GitHub - tarent/loginsrv: JWT login microservice with plugable backends such as OAuth2, Github, htpasswd, osiam
loginsrv is a standalone minimalistic login server providing a JWT login for multiple login backends.
https://github.com/tarent/loginsrv
loginsrv は JWT トークンを使って安全にユーザ識別をやりとり出来る単体のマイクロサービスです。既存のコードを JWT トークンに対応させるだけで認証機能を代行してくれます。また一度この対応を行っておけば loginsrv を使わない実装になったとしても簡単に取り換えられるという訳です。導入方法を紹介して行きます。
loginsrv の起動方法は以下の通り。
Usage of loginsrv:

  -backend value

        Deprecated, please use the explicit flags

  -cookie-domain string

        The optional domain parameter for the cookie

  -cookie-expiry duration

        The expiry duration for the cookie, e.g. 2h or 3h30m. Default is browser session

  -cookie-http-only

        Set the cookie with the http only flag (default true)

  -cookie-name string

        The name of the jwt cookie (default "jwt_token")

  -github value

        Oauth config in the form: client_id=..,client_secret=..[,scope=..,][redirect_uri=..]

  -grace-period duration

        Graceful shutdown grace period (default 5s)

  -host string

        The host to listen on (default "localhost")

  -htpasswd value

        Htpasswd login backend opts: file=/path/to/pwdfile

  -jwt-expiry duration

        The expiry duration for the jwt token, e.g. 2h or 3h30m (default 24h0m0s)

  -jwt-refreshes int

        The maximum amount of jwt refreshes. 0 by Default

  -jwt-secret string

        The secret to sign the jwt token (default "random key")

  -log-level string

        The log level (default "info")

  -login-path string

        The path of the login resource (default "/login")

  -logout-url string

        The url or path to redirect after logout

  -osiam value

        Osiam login backend opts: endpoint=..,client_id=..,client_secret=..

  -port string

        The port to listen on (default "6789")

  -simple value

        Simple login backend opts: user1=password,user2=password,..

  -success-url string

        The url to redirect after login (default "/")

  -template string

        An alternative template for the login form

  -text-logging

        Log in text format instead of json
認証方法が幾らか用意されています。
| 種別 | 説明 |
|---|---|
| htpasswd | MD5やSHA1、Bcryptでパスワードがエンコードされたファイル。 |
| OSIAM | RESTで使用できる認証管理サーバ。 |
| Simple | 引数でユーザとパスワードを指定。 |
| OAuth2 | ご存じ OAuth2。現在は組み込みプロバイダとしてGitHubのみサポート。 |
社内で .htaccess で運用されていた物を使うなんて事も可能です。
JWT トークンの対応には秘密キーが必要です。openssl コマンド等で生成しますがここでは割愛。この秘密キーを loginsrv と共存させる事でユーザ識別のやり取りを可能にします。loginsrv は -jwt-secret という引数で受け取る事も出来ますが、LOGINSRV_JWT_SECRET という環境変数で受け渡す事もできます。
package main


import (

    "fmt"

    "net/http"

    "os"


    "github.com/dgrijalva/jwt-go"

)


var privateHtml = `

こんにちわ %s さん<br />

<a href="/login?logout=true">ログアウト</a>

`


var publicHtml = `

<a href="/login">ログイン</a>

`


func main() {

    secret := os.Getenv("LOGINSRV_JWT_SECRET")

    http.HandleFunc("/", func(w http.ResponseWriter, r *http.Request) {

        w.Header().Set("content-type", "text/html; charset=utf8")

        if c, err := r.Cookie("jwt_token"); err == nil {

            token, err := jwt.Parse(c.Value, func(*jwt.Token) (interface{}, error) {

                return []byte(secret), nil

            })

            if err != nil {

                http.Error(w, err.Error(), http.StatusInternalServerError)

                return

            }

            if claims, ok := token.Claims.(jwt.MapClaims); ok && token.Valid {

                fmt.Fprintf(w, privateHtml, claims["sub"])

                return

            }

        }

        fmt.Fprintln(w, publicHtml)

    })

    http.ListenAndServe(":8888", nil)

}
jwt_token というクッキーを秘密鍵で照合し資格情報 claim を表示しています。本来ならば loginsrv に依存させない様に LOGINSRV_JWT_SECRET ではなく引数などから秘密鍵を貰って下さい。
あとはこのアプリケーションを loginsrv と一緒に起動させます。せっかくなので goreman (foremanクローン) を使います。Procfile は以下の通り。
web1: ./app

web2: loginsrv -htpasswd file=/path/to/htaccess

gorem: gorem
ここで起動している gorem はカスタマイザブルなリバースプロキシサーバです。設定ファイル config.json は以下の通り。
{

  "app": {

    "address": "127.0.0.1:5000",

    "entries": [

      {

        "path": "/login",

        "backend": "http://localhost:6789",

        "use_path": true

      },

      {

        "path": "/",

        "backend": "http://localhost:8888",

        "use_path": true

      }

    ]

  }

}
本番では gorem の代わりに nginx や apache を使うと良いでしょう。最後に JWT の秘密鍵を .env で設定します。
LOGINSRV_JWT_SECRET=deadbeef
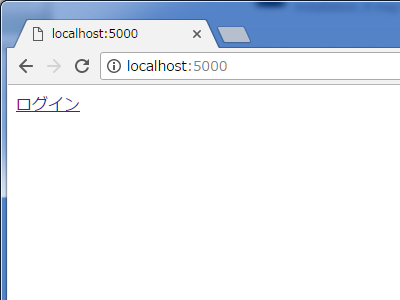
ここまで出来たら goreman start を実行します。ブラウザで http://localhost:5000/ を開くとログインしていない時のコンテンツが表示されます。
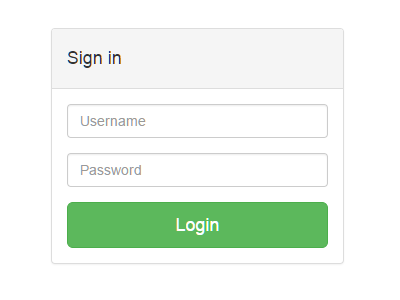
リンクからログイン画面に移動すると以下の画面が表示されます。
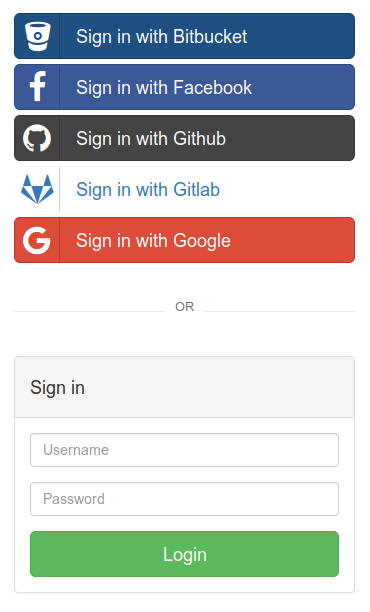
GitHub プロバイダを使う場合は GitHub 認証用のボタンが表示されます。
ログインが成功すると指定のURL(デフォルトは /)に戻ってきます。

開発では .htaccess を使い、本番では OAuth2 を使うといった運用が簡単に行える様になります。今回の例ではアプリケーションをそのまま使いましたが、実際は docker から起動できる様にしておくと以降の開発が便利になるかと思います。
![みんなのGo言語[現場で使える実践テクニック]](https://m.media-amazon.com/images/I/51lqgv+WyxL._SL160_.jpg) みんなのGo言語[現場で使える実践テクニック]
みんなのGo言語[現場で使える実践テクニック]松木雅幸, mattn, 藤原俊一郎, 中島大一, 牧大輔, 鈴木健太
技術評論社 Kindle版 / ¥2,178 (2016年09月09日)
発送可能時間: