床屋。もし結果同じ髪型に仕上がる床屋が2軒あったとして、片方は5分で片方は40分で仕上がる店があったとしたら。私は迷わず40分掛かる床屋に行くだろう。
髪切り落とされる様をただ見る時間。髭をそるクリームを塗られ、髭を剃られるまでの「じらし」。これも床屋の魅力であると思う。
別にしっかり肩を「パンパン」叩いてくれとも思わない。しっかり叩いたら床屋で無くなる気がする。
もしかしたら、コンピュータ業界も同じなのかもしれない。
要件定義から、すぐさま答えの出る業界ならば面白くもなんともないかもしれない。
ああでもない。こうでもないと考えてこそ面白いのであって、仕様が、そして納期が決められているからこそ面白いのだ。別の担当者が作る部品の完成をドキドキしながら待つ時間。それも床屋と同じと考えれば気が楽になったりしないだろうか。しないか...
もしかしたら気の効きすぎた、仕事を100%こなすソフトウェアというのは、実は魅力的でないのかもしれない。
プログラミング言語を取ってみても、各言語毎にそれぞれライブラリがあり目的を達成させる為の近道になる物が沢山ある。
それも良い事だとは思うけれど、気の効いてない言語もまた楽しかったりするんだろうな。
でも、髭くらいはちゃんと剃れ。
2008/04/28
2008/04/24
Google App EngineでXMLをパースするときに手っ取り早い方法
書き換えてしまえ...
エラーが出てたGoogle App Engineのサンプル、muvmuvのレビュービルド「http://localhost:8080/build」も問題なく通った。
良いやり方ではないですが...
*** elementtree/ElementTree.py.orig Thu Apr 24 21:02:09 2008

--- elementtree/ElementTree.py  Thu Apr 24 21:34:42 2008

***************

*** 1252,1254 ****

--- 1252,1267 ----

          tree = self._target.close()

          del self._target, self._parser # get rid of circular references

          return tree

+

+ try:

+     from xml.parsers import expat

+ except ImportError:

+     import xmllib

+     import SimpleXMLTreeBuilder

+     def __init__fake(self, html=0):

+         self.__init__orig(html)

+         xmllib.XMLParser.__init__(self, accept_utf8=1)

+     clazz = SimpleXMLTreeBuilder.TreeBuilder

+     clazz.__init__orig = clazz.__init__

+     clazz.__init__ = __init__fake

+     XMLTreeBuilder = SimpleXMLTreeBuilder.TreeBuilder
ちなみにpatch当てなくても、ElementTree.pyの最下行に
try:

    from xml.parsers import expat

except ImportError:

    import xmllib

    import SimpleXMLTreeBuilder

    def __init__fake(self, html=0):

        self.__init__orig(html)

        xmllib.XMLParser.__init__(self, accept_utf8=1)

    clazz = SimpleXMLTreeBuilder.TreeBuilder

    clazz.__init__orig = clazz.__init__

    clazz.__init__ = __init__fake

    XMLTreeBuilder = SimpleXMLTreeBuilder.TreeBuilder
を足せば出来上がる。こうすると大概のものは小細工無しに動くと思う。たぶんエラーが出てたGoogle App Engineのサンプル、muvmuvのレビュービルド「http://localhost:8080/build」も問題なく通った。
良いやり方ではないですが...
twitter followerの小難しい発言に読みをふってくれるサービス「よみふったー」をリリースした。
Google App EngineでwebSimple.pyを使って作りました。
ライブラリとしてはwebSimple.pyのほかにPyWrapperに含まれるElementTree、BeautifulSoupを使っています。
twitterのfollower発言で、漢字が読めなかった貴方。「@mattn_jp それなんて読むの?」とか聞くのが恥ずかしい貴方。そんな貴方にピッタリのサービスです。twitter followerの発言に「読み」を付けて表示します。(まぁ私は難しい単語なんて使いませんが...)
文字の分解にはYahoo! JAPANの「日本語形態素解析Webサービス」を使用しています。
色の変っている部分にマウスを当てると、ツールチップにて読みを教えてくれるようになっています。
で、いきなりですが「よみふったー」のソースです。
ライブラリとしてはwebSimple.pyのほかにPyWrapperに含まれるElementTree、BeautifulSoupを使っています。
#!-*- coding:utf-8 -*-

import os

import re

import base64

import xmllib

import logging

import elementtree.SimpleXMLTreeBuilder as xmlbuilder

import wsgiref.handlers

from google.appengine.ext import webapp

from google.appengine.ext.webapp import template

from BeautifulSoup import BeautifulSoup

from webSimple import Simple as webSimple


class MainPage(webapp.RequestHandler):

  def post(self):

    twitter_user = self.request.get('twitter_user').encode('utf-8', 'replace')

    template_valuse = {

        'twitter_user' : twitter_user,

        'statuses' : []

    }

    try:

      twitter_url = "http://twitter.com/statuses/user_timeline/%s.xml" % twitter_user

      twitter = webSimple({ 'base_url': twitter_url })


      yahoo = webSimple({

        'base_url': 'http://api.jlp.yahoo.co.jp/MAService/V1/parse',

        'param' : { 'appid' : 'xxxxxxxx', 'results' : 'ma', },

      })


      xml = twitter.get().content

      r = re.compile(r'(\&#\d+;)')

      for st in BeautifulSoup(xml)('status'):

        name = r.sub(lambda x: unichr(int(x.group(1)[2:-1])), st.user.screen_name.string).encode('utf-8', 'replace')

        msg = r.sub(lambda x : unichr(int(x.group(1)[2:-1])), st.text.string).encode('utf-8', 'replace')

        xml = yahoo.get({ 'sentence': msg }).content

        words = []

        for word in BeautifulSoup(xml)('word'):

          words.append({

            'reading' : word.reading.string.encode('utf-8', 'replace'),

            'pos' : word.pos.string.encode('utf-8', 'replace'),

            'surface' : word.surface.string.encode('utf-8', 'replace'),

          })

        template_valuse['statuses'].append({

           'screen_name' : name,

           'words' : words,

        })

    except Exception, e:

      template_valuse['error'] = e

      pass

    path = os.path.join(os.path.dirname(__file__), 'yomifutter.html')

    self.response.out.write(template.render(path, template_valuse))


  def get(self):

    path = os.path.join(os.path.dirname(__file__), 'yomifutter.html')

    self.response.out.write(template.render(path, {}))


def main():

  application = webapp.WSGIApplication([('/yomifutter/', MainPage)], debug=True)

  wsgiref.handlers.CGIHandler().run(application)


if __name__ == '__main__':

  main()
適当なコードで申し訳ない...汗Google App Engineでweb.pyやCherryPyを動かす方法
Google App Engine上でweb.pyとかCherryPyとか動かないという報告がいくらかあったのでまとめてみます。
Google App Engineでは、以下で述べられているように「WSGIに対応したCGI(と呼ばれるもの)であれば、フレームワークとして扱えるよ」と言っています。
ソースコードの中を覗いた所、Google App Engineに対応するコードが入っています。以前までは一般的なCGIとして「print "Hello World!"」してしまえばそのまま出力されていましたが方式が変った様で、GET等はreturnで文字列として返す様になっています。
動くコードとしては以下の様になります。
これで幾らかのフレームワークが動くようになりました。幾らか敷居が低くなるのではないでしょうか。皆さんも色んなアプリケーションを作ってみませんか。
また時間が出来たら、残るPylonsも検証して見たいと思います。
最後に私が好きなCDを...
Google App Engineでは、以下で述べられているように「WSGIに対応したCGI(と呼ばれるもの)であれば、フレームワークとして扱えるよ」と言っています。
Using the webapp Framework - Google App Engine - Google Code今日はこの動かないと言われている部分を解決して頂ける(かもしれない)ポイントをご紹介。
The CGI standard is simple, but it would be cumbersome to write all of the code that uses it by hand. Web application frameworks handle these details for you, so you can focus your development efforts on your application's features. Google App Engine supports any framework written in pure Python that speaks CGI (and any WSGI-compliant framework using a CGI adaptor), including Django, CherryPy, Pylons, and web.py. You can bundle a framework of your choosing with your application code by copying its code into your application directory.
http://code.google.com/appengine/docs/gettingstarted/usingwebapp.html
web.py
まずweb.pyですが、オフィシャルがtarballで配布している物(web.py-0.23.tar.gz)では動きません。最新はhttp://webpy.org/bzr/webpy.dev/で配布されており、bzrを使って取得する必要があります(必要であればhttp://bazaar-vcs.org/Downloadからbzrを取得して下さい)。
bzr get http://webpy.org/bzr/webpy.dev/
これまでの1スクリプトからソケットサーバまで起動するweb.pyのコーディング習慣ではそのままでは動きません。flupを使ってWSGIモジュールを動かす必要があります。以下の様にWSGIハンドラとしてアプリケーションを作成しwsgiref.handlersに起動させます。mod_pythonの場合と同じですかね。ソースコードの中を覗いた所、Google App Engineに対応するコードが入っています。以前までは一般的なCGIとして「print "Hello World!"」してしまえばそのまま出力されていましたが方式が変った様で、GET等はreturnで文字列として返す様になっています。
動くコードとしては以下の様になります。
#!-*- coding:utf-8 -*-

import web


urls = (

  '/hello/(.*)', 'hello'

)


class hello:

  def GET(self, name):

    web.header("Content-Type", "text/html; charset=utf-8")

    return "Hello World!"


if __name__ == "__main__":

  web.application(urls, globals()).cgirun()
但し、「web.pyが内部でimportしているopenid.consumerが無いよ!」と怒られるのでpython-openidをいっそ入れてしまうか、以下のパッチを当てる必要があります。
--- web/__init__.py.orig    Wed Apr 23 19:12:33 2008

+++ web/__init__.py Wed Apr 23 19:12:35 2008

@@ -26,7 +26,7 @@

 from httpserver import *

 from debugerror import *

 from application import *

-import webopenid as openid

+#import webopenid as openid


 try:

     import cheetah
まだ開発版の様ですから、今後に期待したいです。CherryPy
次にCherryPyですが少し小細工が必要です。Google App EngineではPure Pythonで無いものは動かないのですがCherryPyに含まれるWSGIServer(実際にはSSL機能)がsocket._fileobjectを使ってしまっていてモジュールのインポートに失敗します。以下の様にしてSSL_fileobjectを殺してやる必要があります。
--- cherrypy/wsgiserver/__init__.py.orig    Sun Jan 13 17:56:50 2008

+++ cherrypy/wsgiserver/__init__.py Wed Apr 23 16:47:34 2008

@@ -57,11 +57,12 @@

 from urllib import unquote

 from urlparse import urlparse


-try:

-    from OpenSSL import SSL

-    from OpenSSL import crypto

-except ImportError:

-    SSL = None

+#try:

+#    from OpenSSL import SSL

+#    from OpenSSL import crypto

+#except ImportError:

+#    SSL = None

+SSL = None


 import errno

 socket_errors_to_ignore = []

@@ -676,19 +677,19 @@

                 raise socket.timeout("timed out")

     return ssl_method_wrapper


-class SSL_fileobject(socket._fileobject):

-    """Faux file object attached to a socket object."""

-

-    ssl_timeout = 3

-    ssl_retry = .01

-

-    close = _ssl_wrap_method(socket._fileobject.close)

-    flush = _ssl_wrap_method(socket._fileobject.flush)

-    write = _ssl_wrap_method(socket._fileobject.write)

-    writelines = _ssl_wrap_method(socket._fileobject.writelines)

-    read = _ssl_wrap_method(socket._fileobject.read, is_reader=True)

-    readline = _ssl_wrap_method(socket._fileobject.readline, is_reader=True)

-    readlines = _ssl_wrap_method(socket._fileobject.readlines, is_reader=True)

+#class SSL_fileobject(socket._fileobject):

+#    """Faux file object attached to a socket object."""

+#

+#    ssl_timeout = 3

+#    ssl_retry = .01

+#

+#    close = _ssl_wrap_method(socket._fileobject.close)

+#    flush = _ssl_wrap_method(socket._fileobject.flush)

+#    write = _ssl_wrap_method(socket._fileobject.write)

+#    writelines = _ssl_wrap_method(socket._fileobject.writelines)

+#    read = _ssl_wrap_method(socket._fileobject.read, is_reader=True)

+#    readline = _ssl_wrap_method(socket._fileobject.readline, is_reader=True)

+#    readlines = _ssl_wrap_method(socket._fileobject.readlines, is_reader=True)


 class HTTPConnection(object):
あとはweb.py同様に
import cherrypy

import wsgiref.handlers


class OnePage(object):

  def index(self):

      return "one page!"

  index.exposed = True


class HelloWorld(object):

  onepage = OnePage()


  def index(self):

    return "hello world"

  index.exposed = True


def main():

  app = cherrypy.Application(HelloWorld(), "/helloworld")

  wsgiref.handlers.CGIHandler().run(app)


if __name__ == '__main__':

  main()
とすればGoogle App Engine上でも動きます。上の例にあるCherryPy独特の「/helloworld/onepage」も動きますよ!これで幾らかのフレームワークが動くようになりました。幾らか敷居が低くなるのではないでしょうか。皆さんも色んなアプリケーションを作ってみませんか。
また時間が出来たら、残るPylonsも検証して見たいと思います。
最後に私が好きなCDを...
pytumblrをGoogle App Engineで動くように改造してみた
こんなのあるんだ...
 そう言えば前に「Windowsのエクスプローラで「送る」からShareOnTumblr」なんてのも作ったなぁ。
pythonで作ってあってlinuxなんかでも動くように作ったはず。
そう言えば前に「Windowsのエクスプローラで「送る」からShareOnTumblr」なんてのも作ったなぁ。
pythonで作ってあってlinuxなんかでも動くように作ったはず。
でpytumblrですが、ソース見たら簡単なソースだったのでGoogle App Engineで動くように改造してみました。以下パッチ
minidomの代わりにBeautifulSoupを、urllib2の代わりにurlfetchを使っています。したがってgetblogは自分のregular情報のdictだけを返すのではなくBeautifulSoupを使ってlink、photo、quoteを返す様にしてあります。
実際に動くよって所は以下のサイトで確認して下さい。
今回のデモにはweb.pyというフレームワークを使用してみました。
以下スクリプトソースです。
解決方あるのか、調べてみます。pytumblrで面白いもの作ってみて下さい。
freshmeat.net: Project details for pytumblr - ロックスターになりたい
pytumblr is a Python library for the tumblr.com API. freshmeat.net: Project details for pytumblr
そう言えば前に「Windowsのエクスプローラで「送る」からShareOnTumblr」なんてのも作ったなぁ。
pythonで作ってあってlinuxなんかでも動くように作ったはず。でpytumblrですが、ソース見たら簡単なソースだったのでGoogle App Engineで動くように改造してみました。以下パッチ
--- pytumblr.py.orig    Thu Apr 24 03:15:26 2008

+++ pytumblr.py Thu Apr 24 12:02:32 2008

@@ -1,7 +1,9 @@

 #!/usr/bin/env python

+#!-*- coding:utf-8 -*-


-import string, httplib, urllib2, urllib

-from xml.dom import minidom

+import urllib2, urllib

+from google.appengine.api import urlfetch

+from BeautifulSoup import BeautifulSoup


 class pytumblr(object):

    """Tumblr API Object.

@@ -75,14 +77,11 @@


        data = urllib.urlencode(values)

        headers = {"Content-type": "application/x-www-form-urlencoded"}

-       conn = httplib.HTTPConnection(self.url)

-       conn.follow_all_redirects = True

-       conn.request("POST",'/api/write', data, headers)

-       response = conn.getresponse()

-       if ( int(response.status) == 201):

+       response = urlfetch.fetch("http://%s/api/write" % self.url, headers=headers, method='POST', payload=data)

+       if ( int(response.status_code) == 201):

            return 'Success'

-       elif( int(response.status) != 201):

-           raise 'Error - Status %s (%s) returned' %(response.status, response.reason)

+       elif( int(response.status_code) != 201):

+           raise 'Error - Status %s (%s) returned' %(response.status_code, 'something wrong')


    def auth(self):

        values = {

@@ -92,13 +91,10 @@

            }

        data = urllib.urlencode(values)

        headers = {"Content-type": "application/x-www-form-urlencoded"}

-       conn = httplib.HTTPConnection(self.url)

-       conn.follow_all_redirects = True

-       conn.request("POST", '/api/write', data, headers)

-       response = conn.getresponse()

-       if ( int(response.status) != 200 ):

-           return '< There was a tiny problem: %s (%s) >' %(response.status, response.reason)

-       if ( int(response.status) == 200 ):

+       response = urlfetch.fetch("http://%s/api/write" % self.url, headers=headers, method='POST', payload=data)

+       if ( int(response.status_code) != 200 ):

+           return '< There was a tiny problem: %s (%s) >' %(response.status_code, 'something wrong')

+       if ( int(response.status_code) == 200 ):

            return '< Authenticated! >'


@@ -112,25 +108,8 @@

            opts = opts + "?type=" + type

        if ( id != 'None' ):

            opts = opts + "?id=" + id

-       return urllib.urlopen('http://%s.tumblr.com/api/read%s' %(self.user, opts)).read()

+       return urlfetch.fetch('http://%s.tumblr.com/api/read%s' %(self.user, opts)).content


    def getblog(self):

-       rxml = minidom.parseString(self.blogread())

-       titles = rxml.getElementsByTagName('regular-title')

-       postid = rxml.getElementsByTagName('post')

-       i = 0

-       n = 0

-       posts = {}

-       while ( i < len(postid)):

-           if ( postid[i].attributes['type'].value == 'regular' ):

-               t = titles [n]

-               t = t.toxml()

-               t = t.replace('<regular-title)', '')

-               t = t.replace('</regular-title)', '')

-               poid = postid[i].attributes["id"].value

-               posts[ poid ] = t

-               n = n + 1

-           if ( postid[i].attributes['type'].value != 'regular' ):

-               pass

-           i = i + 1

-       return posts

+       soap = BeautifulSoup(self.blogread())

+       return soap('post')
思いっきり弄ってますね。。。minidomの代わりにBeautifulSoupを、urllib2の代わりにurlfetchを使っています。したがってgetblogは自分のregular情報のdictだけを返すのではなくBeautifulSoupを使ってlink、photo、quoteを返す様にしてあります。
実際に動くよって所は以下のサイトで確認して下さい。
pytumblrこのサイトのURLの後ろに
http://mattn.appspot.com/tumblr/mattn
と言った感じにtumblrアカウント名を付けてみて下さい。今回のデモにはweb.pyというフレームワークを使用してみました。
以下スクリプトソースです。
#!-*- coding:utf-8 -*-

import web

from pytumblr import pytumblr

from BeautifulSoup import BeautifulSoup


def unescape(str):

  return  BeautifulSoup(str, convertEntities=BeautifulSoup.HTML_ENTITIES).contents[0].encode('utf-8', 'replace')


urls = (

  '/tumblr/(.*)', 'tumblr'

)

render = web.template.render('templates/')


class tumblr:

  def GET(self, name):

    web.header("Content-Type", "text/html; charset=utf-8")

    template_values = { 'name': '', 'posts': [] }

    name = name.replace('/', '')

    if name:

      pt = pytumblr(name, None, None)

      template_values['name'] = name

      for blog in pt.getblog():

        if blog['type'] == 'link':

          template_values['posts'].append({

            'type': 'link',

            'text': unescape(blog('link-text')[0].string),

            'desc': blog('link-description') and unescape(blog('link-description')[0].string) or '',

            'link': unescape(blog('link-url')[0].string),

          })

        if blog['type'] == 'photo':

          template_values['posts'].append({

            'type': 'photo',

            'text': unescape(blog('photo-caption')[0].string),

            'link': unescape(blog('photo-url')[0].string),

          })

        if blog['type'] == 'quote':

          template_values['posts'].append({

            'type': 'quote',

            'text': unescape(blog('quote-text')[0].string),

            'link': unescape(blog('quote-source')[0].string),

          })

    return render.tumblr(template_values)


if __name__ == "__main__":

  web.application(urls, globals()).cgirun()
案外短く書けますね。そしてテンプレートHTML
$def with (res)

<html>

<head>

<meta http-equiv="Content-Type" content="text/html; charset=UTF-8" />

<link rel="stylesheet" href="/static/css/tumblr.css" type="text/css" />

$if res['name']:

    <title>pytumblr - $res['name']</title>

$else:

    <title>pytumblr</title>

</head>

<body>

$if res['name']:

    <h1>pytumblr - $res['name']</h1>

$else:

    <h1>pytumblr</h1>

    <img src="http://b.hatena.ne.jp/entry/image/http://mattn.appspot.com/tumblr/" title="はてなブックマーク" />

    <div id="content">

$if res['name']:

    <h2>$res['name']'s tumblr</h2>

    $for post in res['posts']:

        $if post['type'] == 'photo':

            <b>PHOTO:</b>$:post['text']<br />

            <blockquote><img src="$post['link']" /></blockquote>

        $elif post['type'] == 'link':

            <b>LINK:</b><a href="$post['link']">$:post['text']</a><br />

            <blockquote class="link">$:post['desc']</blockquote>

        $elif post['type'] == 'quote':

            <b>QUOTE:</b><br />

            <blockquote class="quote">

                $:post['text']<br />

                <cite>$:post['link']</cite>

            </blockquote>

    </div>

    <hr clear="all" />

    <p style="text-align: center">provided by <a href="http://mattn.kaoriya.net">mattn</a>, hosted on google app server.</p>

</body>

</html>
このweb.pyのテンプレートって癖があってpythonインデント方式なのですが、これってpreとかcodeで先頭が入っちゃったら不味いんじゃないかと思ったり...解決方あるのか、調べてみます。pytumblrで面白いもの作ってみて下さい。
Qaaに回答を投げるMinibufferコマンド書いた
クァーってサービスが出来たみたいです。
でもいちいちtwitterやIMから「@qaa qid14 YES」とか入力するの面倒臭いのでMinibufferコマンド作ってみました。
アンケートエントリページに行って、「q y」もしくは「q n」で「YES」もしくは「NO」の回答をtwitter経由で投稿します。
※一応、firefox3/greasemonkeyからBasic認証のダイアログが出ない件は対応してあります。
Qaa(クァー):Twitterで簡単アンケート!(まだまだ開発中)twitterを使ったソーシャルアンケートサービスですね。

Qaa(クァー)は、Twitterを利用して簡単にアンケートをとることができるサービスです。
Qaa(クァー)を通じて投稿されたアンケートはYes or No形式で回答する事ができ、その結果はアンケート毎に用意されるページでパイチャートで確認する事ができます。
http://qaa.orig.jp/h#about
でもいちいちtwitterやIMから「@qaa qid14 YES」とか入力するの面倒臭いのでMinibufferコマンド作ってみました。
アンケートエントリページに行って、「q y」もしくは「q n」で「YES」もしくは「NO」の回答をtwitter経由で投稿します。
qaa_yes_or_no.user.jsよろしければどうぞ。
※一応、firefox3/greasemonkeyからBasic認証のダイアログが出ない件は対応してあります。
2008/04/21
wedataのデータを扱えるpythonモジュール書いた
なるべくdictぽく扱えるように作ってみました。
WedataオブジェクトのコンストラクタにAPIKEYを掘り込んで操作します。
いつものようにコードはcodereposに置いてあります。
WedataオブジェクトのコンストラクタにAPIKEYを掘り込んで操作します。
api = Wedata('xxxxxxxxxxxxxxxxxxxxxxxxxxxxxx')

databases = api.databases()

for database in databases:

  print database

  for key in database.keys():

    print " %s=%s" % (key, database[key])

  print

print
また、AutoPagerizeのデータベースであれば以下の様にdataプロパティからの属性参照の様に書く事も出来ます。
database = api.database('AutoPagerize')

print "%s : %s" % (database.name, database.description)

items = database.items()

for item in database.items():

  print " %s" % item.data.pageElement

  print " %s" % item.data.insertBefore

  print
Database.create_databaseの戻り値にはデータベース名(キー名)、Item.create_itemの戻り値にはアイテムIDが戻ります。このIDを使ってDatabase.delete_datebaseおよびItem.dalete_itemを呼び出す事が出来ます。
dbid = api.create_database('my_example_database', 'my_example_database', ['name', 'description'], ['value', 'xpath'], False)

api.delete_database(dbid)
今のところGoogle App Engineには対応していません。Google App Engine上での用途を見付けたら対応するかもしれません。いつものようにコードはcodereposに置いてあります。
/lang/python/wedata
2008/04/18
Google App Engineで、fk_2000氏と愉快な仲間達がお届けする「世界のナベアツ」を作った
世界のナベアツにはてなブックマークで挑戦する - ネットランダムなんと!ソフトウェアでやるべきネタを人力で!!!
はてなブックマークのコメントで、1から40まで数えて、3の倍数 と3がつく数字の時だけアホになります。
それではどうぞ!
http://d.hatena.ne.jp/fk_2000/20080418/p2
むむむ...こうなればこれをまたソフトウェアで表現するべき!
fk_2000氏と愉快な仲間達がお届けする「世界のナベアツ」
ちなみにコードはこんなの
#!-*- coding:utf-8 -*-

import os

from google.appengine.ext.webapp import template

from google.appengine.api import urlfetch

from BeautifulSoup import BeautifulSoup

import logging


try:

  res = urlfetch.fetch('http://b.hatena.ne.jp/entry/rss/http://d.hatena.ne.jp/fk_2000/20080418/p2')

  print "Content-Type: text/html; charset=UTF-8"

  print ""

  items = []

  for item in BeautifulSoup(res.content)('item'):

    logging.info(item.title)

    logging.info(item.title.string)

    items.insert(0, {

      'title' : item.title.string,

      'description' : item.description.string,

    })

  template_values = {

    'items': items

  }

  path = os.path.join(os.path.dirname(__file__), 'nabeatzz_fk_2000.html')

  print template.render(path, template_values)

except Exception, e:

  print "Status: 400"

  print ""

  print e
Minibufferから「We Heart It」出来るグリモン「weheartit.user.js」書いた
reblogぽいですが、私は「We Heart It」の方が好きかな。画像だけに絞っているのがカッコイイ
Minibufferからキー「h i」だけでポスト出来るグリモン書いた。オリジナルのブックマークの動作に従い、250x100以上の画像をポストします。ブックマークレットの場合には「Heart It」のリンクが付きますが、このグリモンではLDRizeのカレントノードに含まれるサイズ250x100以上の画像(PNG/JPG/GIF)をweheartit.comにポストします。
あと、コマンド好きな人は
さっきからtumblr dashboardで使っているのですが便利すぎる!
tomblooのコミット権貰ったので気が向いたら...
Minibufferからキー「h i」だけでポスト出来るグリモン書いた。オリジナルのブックマークの動作に従い、250x100以上の画像をポストします。ブックマークレットの場合には「Heart It」のリンクが付きますが、このグリモンではLDRizeのカレントノードに含まれるサイズ250x100以上の画像(PNG/JPG/GIF)をweheartit.comにポストします。
あと、コマンド好きな人は
:pinned-or-current-node | weheartit | clear-pin
とかやっとけ!さっきからtumblr dashboardで使っているのですが便利すぎる!
weheartit.user.jsよかったら、もってけ!
tomblooのコミット権貰ったので気が向いたら...
2008/04/15
Google App Engineで動くweblog作った。
出来た。とりあえずの機能としては
でもどのディレクトリに上げていいか分かりません><
追記
http://coderepos.org/share/browser/websites/appspot.com/blog/trunk
にアップした。
- デザインテンプレート
- プラグイン機能
- 検索(プラグイン実装)
- ページング(プラグイン実装)
- 編集(プラグイン実装)
- コメント/トラックバック(プラグイン実装)
Weblogにあります。適当にmicroformatに対応してあります。
この後codereposに上げる予定です。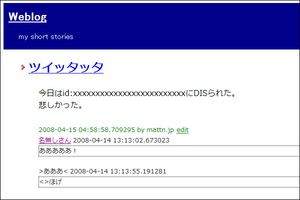

でもどのディレクトリに上げていいか分かりません><
追記
http://coderepos.org/share/browser/websites/appspot.com/blog/trunk
にアップした。
2008/04/10
Google App Engine上で動いている世界のナベアツAPI「NabeAtzz」をXMLRPCで動くようにした
pythonにはxmlrpclibがあり、常駐型のSimpleXMLRPCServerやCGIから使えるCGIXMLRPCRequestHandlerというとても有用なモジュールが存在します。
たとえば
またモジュールとしてインタフェースを提供したい場合は
先ほど、NabeAtzz APIをXMLRPCとして呼び出せるインタフェースを作りました。
エントリポイントは
たとえば
def plus(num1, num2):

    return num1 + num2
という関数をXMLRPCサーバから公開したい場合
from SimpleXMLRPCServer import CGIXMLRPCRequestHandler

handler = CGIXMLRPCRequestHandler()

handler.register_function(plus)

handler.handle_request()
とすれば出来上がります。またモジュールとしてインタフェースを提供したい場合は
class Foo:

    def plus(self, num1, num2):

        return num1 + num2
というインタフェースに対して
from SimpleXMLRPCServer import CGIXMLRPCRequestHandler

handler = CGIXMLRPCRequestHandler()

handler.register_instance(Foo())

handler.handle_request()
こうすれば出来上がり。先ほど、NabeAtzz APIをXMLRPCとして呼び出せるインタフェースを作りました。
エントリポイントは
http://mattn.appspot.com/nabeatzz_xmlrpcとなります。試しにpythonでXMLRPC Clientを作成し呼び出してみます。
# -*- coding: utf-8 -*-

import sys

from xmlrpclib import ServerProxy


api = ServerProxy("http://mattn.appspot.com/nabeatzz_xmlrpc")

for n in range(1, 11):

  res = api.nabeatzz(n)

  print "%s : %s" % (res['number'], res['japanese'])

  if res.has_key('nabeatzz'):

    for c in res['nabeatzz']:

      print "  %s" % c
コードはこんな感じでしょうか。これを実行すると正しく
1 : いち

2 : に

3 : さん

  アホになる

4 : よん

5 : ご

  犬っぽくなる

6 : ろく

  アホになる

7 : なな

8 : はち

9 : きゅう

  アホになる

10 : じゅう

  犬っぽくなる
という結果が得られました。Google App Engineを使って世界のナベアツAPI「NabeAtzz」を作った
追記
日本語表記を返す様に修正しました。japaneseという属性で返ります。
例) 35 : さんじゅうご
JSONとXMLをサポートしています。
template engineでjavascriptとXMLがどう処理出来るかを調べてる間に、いつのまにか作ってしまっていました...。 JSONの場合は以下の様なテンプレート
nabeatzz.json
次にXMLの場合は
nabeatzz.xml
なお、templateについてはdjangoのtemplate engineと同じ物ですので「テンプレート作者のための Django テンプレート言語ガイド : Django オンラインドキュメント和訳」を参考にすると良いかと思います。
でpythonコードは以下
nabeatzz.py
日本語表記を返す様に修正しました。japaneseという属性で返ります。
例) 35 : さんじゅうご
JSONとXMLをサポートしています。
template engineでjavascriptとXMLがどう処理出来るかを調べてる間に、いつのまにか作ってしまっていました...。 JSONの場合は以下の様なテンプレート
nabeatzz.json
{% if callback %}{{ callback }}({% endif %}{ number: {{ number }}, japanese: '{{ japanese }}', nabeatzz : [{% if nabeatzz %}'{{ nabeatzz|join:"','" }}'{% endif %}] }{% if callback %}){% endif %}
「value|join: "xxx"」とか便利ですね。次にXMLの場合は
nabeatzz.xml
<?xml version="1.0" encoding="UTF-8"?>

<response>

    <number>{{ number }}</number>

    <japanese>{{ japanese }}</japanese>{% for c in nabeatzz %}

    <nabeatzz>{{ c }}</nabeatzz>{% endfor %}

</response>
こんな感じです。これはすごい!フツーすぎます。なお、templateについてはdjangoのtemplate engineと同じ物ですので「テンプレート作者のための Django テンプレート言語ガイド : Django オンラインドキュメント和訳」を参考にすると良いかと思います。
でpythonコードは以下
nabeatzz.py
#!-*- coding:utf-8 -*-

import os

import cgi

from google.appengine.ext.webapp import template


ndg = [

  {0: ''},

  {0: 'じゅう'},

  {0: 'ひゃく', 3: 'ぴゃく', 6: 'ぴゃく', 8: 'ぴゃく'},

  {0: 'せん', 3: 'ぜん'},

]


dig = [

  {0: ''},

  {0: 'まん'},

  {0: 'おく'},

  {0: 'ちょう'},

  {0: 'けい'},

  {0: 'がい'},

  {0: 'じょ'},

  {0: 'じょう'},

  {0: 'こう'},

  {0: 'かん'},

  {0: 'せい'},

  {0: 'さい'},

  {0: 'ごく'},

  {0: 'こうがしゃ'},

  {0: 'あそうぎ'},

  {0: 'なゆた'},

  {0: 'ふかしぎ'},

  {0: 'むりょうたいすう'}

]


num = [

  {0: 'ぜろ'},

  {0: 'いち'},

  {0: 'に'},

  {0: 'さん'},

  {0: 'よん'},

  {0: 'ご'},

  {0: 'ろく', 3: 'ろっ'},

  {0: 'なな'},

  {0: 'はち', 3: 'はっ', 4: 'はっ'},

  {0: 'きゅう'}

]


def num2ja(arg):

  sn = str(arg)

  ln = len(sn)

  if sn == 0:

    return num[0][0]

  if ln >= 17*4+1:

    return dig[17][0]

  n = 0

  ret = ""


  while n < ln:

    if sn[n] != 0 and (sn[n] != 1 or (ln-n)%4 == 1):

      ret += num[int(sn[n])].has_key(ln-n) and num[int(sn[n])][ln-n] or num[int(sn[n])][0]

    if sn[n] != 0:

      ret += ndg[(ln-n-1)%4].has_key(sn[n]) and ndg[(ln-n-1)%4][int(sn[n])] or ndg[(ln-n-1)%4][0]

      ret += dig[(ln-n-1)/4].has_key(sn[n]) and dig[(ln-n-1)/4][int(sn[n])] or dig[(ln-n-1)/4][0]

    n += 1


  return ret


try:

    form = cgi.FieldStorage()

    number = ""

    format = "json"

    nabeatzz = []

    nabeatzz_3 = "アホになる"

    nabeatzz_5 = "犬っぽくなる"

    callback = ""

    mime = {

      'json': 'text/javascript',

      'xml': 'text/xml',

    }


    if form:

        if form.has_key('number'):   number = int(form['number'].value)

        if form.has_key('format'):   format = form['format'].value

        if form.has_key('callback'): callback = form['callback'].value


    if number and format in mime.keys():

        if (number % 3) == 0 or str(number).find("3") != -1: nabeatzz.append(nabeatzz_3)

        if (number % 5) == 0: nabeatzz.append(nabeatzz_5)

        template_values = {

            'number'   : number,

            'japanese' : num2ja(number),

            'nabeatzz' : nabeatzz,

            'callback' : callback,

        }

        print "Content-Type: %s; charset=UTF-8" % mime[format]

        print ""

        path = os.path.join(os.path.dirname(__file__), 'nabeatzz.%s' % format)

        print template.render(path, template_values)

    else:

        print "Content-Type: text/html; charset=UTF-8"

        print ""

        path = os.path.join(os.path.dirname(__file__), 'nabeatzz.html')

        print template.render(path, {})

except:

    print "Status: 400"
一応、動く物も用意しました。NabeAtzz APIおもいっきりネタですね...。
2008/04/09
Google App Engine上でwebSimpleを動かし、ネタバイザーの最新ネタをLingrのチャットルームに発言する
アプリ第2号です。といってもflickr画像検索同様に有用な物ではありません。
pythonで動作するWebService::Simple「webSimple」を使ってネタバイザーのRSSから最新ネタを取得し、LingrのチャットルームにこれまたwebSimpleで発言するアプリです。
まずテンプレート
lingr.html
lingr.py
なお、先ほど修正したのですがPyWrapperのTreeBuilderはlibxml.XMLParserを初期化する際にutf-8を許可するかどうかのフラグ、「accept_utf8」を0のまま渡してしまっています。よってutf-8なXMLが通りませんでした。
初期化が冗長ですが、作ったTreeBuilderをlibxml.XMLParser.__init__で再初期化する様修正しています。
pythonで動作するWebService::Simple「webSimple」を使ってネタバイザーのRSSから最新ネタを取得し、LingrのチャットルームにこれまたwebSimpleで発言するアプリです。
まずテンプレート
lingr.html
<html>

<head>

<meta http-equiv="Content-Type" content="text/html; charset=UTF-8" />

<title>ネタバイザーのネタをlingrに転送</title>

<style tyle="text/css"><!--

body {

    font-family: 'メイリオ', 'Osaka'

}

#content {

    margin-left: 50px;

}

--></style>

</head>

    <body>

        <h1>ネタバイザーのネタをlingrに転送</h1>

        <div id="content">

        <p><a href="http://netaviser.woresukebe.com/" class="external" target="_blank">ネタバイザー</a>の最新発言を受信し、<a href="http://www.lingr.com/" class="external" target="_blank">Lingr</a>のチャットルーム「<a href="http://www.lingr.com/room/hO4SmQWTdJ4">LingrAPI Test</a>」に転送します。</p>

        <p>「ネタ転送」ボタンを押下して下さい。</p>

        <form method="post">

            <input type="submit" value="ネタ転送" />

        </form>

        <div>

            {% if neta %}

            ネタ「{{ neta|escape }}」を転送しました。

            {% endif %}

        </div>

        </div>

        <hr />

        <p style="text-align: center">provided by <a href="http://mattn.kaoriya.net">mattn</a>, hosted on google app server.</p>

    </body>

</html>
そしてハンドラlingr.py
#!-*- coding:utf-8 -*-

import os

import cgi

import wsgiref.handlers

from google.appengine.ext import webapp

from google.appengine.ext.webapp import template

from google.appengine.api import urlfetch

from webSimple import Simple

import elementtree.SimpleXMLTreeBuilder as xmlbuilder

import xmllib


class MainPage(webapp.RequestHandler):

  def get_neta(self):

      neta = urlfetch.fetch('http://netaviser.woresukebe.com/index.xml').content

      parser = xmlbuilder.TreeBuilder()

      xmllib.XMLParser.__init__(parser, accept_utf8=1)

      parser.feed(neta)

      xml = parser.close()

      return xml.find('channel/item/title').text


  def post(self):

    api = Simple({

        'base_url' : 'http://www.lingr.com',

        'param' : {

            'api_key' : 'your-api-key',

            'format'  : 'xml'

        },

    })


    neta = self.get_neta()


    session = api.get({}, {

        'path' : '/api/session/create',

    }).parse_xml().find('session').text;


    ticket = api.get({

        'session'  : session,

        'id'       : 'hO4SmQWTdJ4',

        'nickname' : 'ネタバイザー転送サーバ',

    }, {

        'path' : '/api/room/enter',

    }).parse_xml().find('ticket').text;


    status = api.get({

        'session'  : session,

        'ticket'   : ticket,

        'message'  : neta,

    }, {

        'path' : '/api/room/say',

    }).parse_xml().find('status').text;


    api.get({

        'session'  : session,

    }, {

        'path' : '/api/session/destroy',

    })


    path = os.path.join(os.path.dirname(__file__), 'lingr.html')

    template_values = {

        'session' : session,

        'ticket'  : ticket,

        'neta'    : neta,

        'status'  : status,

    }

    self.response.out.write(template.render(path, template_values))


  def get(self):

    path = os.path.join(os.path.dirname(__file__), 'lingr.html')

    self.response.out.write(template.render(path, {}))


def main():

  application = webapp.WSGIApplication([('/lingr/', MainPage)], debug=True)

  wsgiref.handlers.CGIHandler().run(application)
で、動いている物がこちらネタバイザーのネタをlingrに転送ネタバイザーに負荷が掛かりますので、あまりにリクエストが多い場合には停止させて頂く所存です。またネタバイザーの方が苦情があれば、これまた停止させて頂く所存です。
なお、先ほど修正したのですがPyWrapperのTreeBuilderはlibxml.XMLParserを初期化する際にutf-8を許可するかどうかのフラグ、「accept_utf8」を0のまま渡してしまっています。よってutf-8なXMLが通りませんでした。
初期化が冗長ですが、作ったTreeBuilderをlibxml.XMLParser.__init__で再初期化する様修正しています。
Google App EngineでXMLをパースする方法(python版WebService::Simpleを使ってflickr画像検索を作る)
Google App Engineを弄り始めています。
昨日はGoogle App EngineにXMLパーサが入っていない(実際にはpyexptが入っていない)為、python版のWebService::Simpleが動きませんでしたが、PyWrapperを使う事で解決する事が分かりました。結構知れれていないと思いますので、実は結構有益情報かもしれません。
さっそく昨日作ったpython版WebService::Simple「webSimple」を改良し
そしてflickr検索のコードは以下の様になりました。
flickr.html
flickr.py
flickr検索ページが出来上がりました。現状は写真3枚までしか検索出来ないようにしてあります。
なお、ディレクトリ構造は
またwebSimpleのコードはcodereposに上げておきますので、興味のある方は見てください。
I love python!
昨日はGoogle App EngineにXMLパーサが入っていない(実際にはpyexptが入っていない)為、python版のWebService::Simpleが動きませんでしたが、PyWrapperを使う事で解決する事が分かりました。結構知れれていないと思いますので、実は結構有益情報かもしれません。
PyWrapper - Tracこれはすごい!
さっそく昨日作ったpython版WebService::Simple「webSimple」を改良し
- google.appengine.api.urlfetchがimport出来るならばfetchを使用
- elementtree.SimpleXMLTreeBuilderがimport出来るならTreeBuilderを使用
そしてflickr検索のコードは以下の様になりました。
api = Simple({

    'base_url' : 'http://api.flickr.com/services/rest',

    'param' : {

        'api_key' : 'your-api-key'

    },

})

res = api.get({

    'method'   : 'flickr.photos.search',

    'text'     : keyword.encode('utf-8', 'replace'),

    'per_page' : 3,

});

print res.parse_xml().find("photos").getchildren()
あとは、WSGIApplicationに仕立てる為に以下の様なテンプレートを用意します。flickr.html
<html>

    <head>

        <meta http-equiv="Content-Type" content="text/html; charset=UTF-8" />

        <title>flickr画像検索</title>

    </head>

    <body>

        <form method="post">

            <input type="text" name="keyword" value="{{ keyword }}" />

            <input type="submit" />

        </form>

        <div id="content"></div>

        {% for e in photos %}

        <a href="http://www.flickr.com/photos/{{ e.attrib.owner }}/{{ e.attrib.id }}/">

            <img src="http://static.flickr.com/{{ e.attrib.server }}/{{ e.attrib.id }}_{{ e.attrib.secret }}_m.jpg" title="{{ e.attrib.title }}" />

        </a>

        <br />{% endfor %}

        <!--

        <pre>{{ content|escape }}</pre>

        -->

    </body>

</html>
さらに以下の様なハンドラを書きます。flickr.py
#!-*- coding:utf-8 -*-

import os

import cgi

import wsgiref.handlers

from google.appengine.ext import webapp

from google.appengine.ext.webapp import template

from webSimple import Simple


class MainPage(webapp.RequestHandler):

  def post(self):

    keyword = cgi.escape(self.request.get('keyword'))

    api = Simple({

        'base_url' : 'http://api.flickr.com/services/rest',

        'param' : {

            'api_key' : 'your-api-key'

        },

    })

    res = api.get({

        'method'   : 'flickr.photos.search',

        'text'     : keyword.encode('utf-8', 'replace'),

        'per_page' : 3,

    });

    path = os.path.join(os.path.dirname(__file__), 'flickr.html')

    photos = []

    template_values = {

        'keyword' : keyword,

        'photos'  : res.parse_xml().find("photos").getchildren(),

        #'photos'  : [],

        'content' : res.content,

    }

    self.response.out.write(template.render(path, template_values))


  def get(self):

    path = os.path.join(os.path.dirname(__file__), 'flickr.html')

    self.response.out.write(template.render(path, {}))


def main():

  application = webapp.WSGIApplication([('/flickr/', MainPage)], debug=True)

  wsgiref.handlers.CGIHandler().run(application)
最後に「dev_appserver.py」で動作確認し、「appcfg.py」で更新したら出来上がり。flickr検索ページが出来上がりました。現状は写真3枚までしか検索出来ないようにしてあります。
flickr画像検索
なお、ディレクトリ構造は
─mattn

  │  flickr.html

  │  flickr.py

  │  webSimple.py

  │

  └─elementtree

          ElementInclude.py

          ElementPath.py

          ElementPath.pyc

          ElementTree.py

          ElementTree.pyc

          HTMLTreeBuilder.py

          SgmlopXMLTreeBuilder.py

          SimpleXMLTreeBuilder.py

          SimpleXMLTreeBuilder.pyc

          SimpleXMLWriter.py

          TidyHTMLTreeBuilder.py

          TidyTools.py

          XMLTreeBuilder.py

          __init__.py

          __init__.pyc
となっており、elementtreeはPyWrapperから部分的に使用しています。またwebSimpleのコードはcodereposに上げておきますので、興味のある方は見てください。
/lang/python/webSimple/webSimple.py - CodeRepos::Share - Trac
I love python!
2008/04/08
python版のWebService::Simpleを作ってみた。でもGoogle App Engineでは駄目だった
コードはcodereposに置いておきます。
ただしgoogle appengineにはminidomが使っているpyexpatが入ってないのでcontentを取得するまでは動きますがparse_xmlは動きません。
つまりはgoogle appengineのボツネタ第一号って事になりました。
なおfilckr_echo.plをpythonで書いた場合のコードは以下の様になります。
10分程度で作った物なので適当ですが
/lang/python/webSimplegoogle appengineのurlfech APIがある場合は、そちらを使うようになっています。
ただしgoogle appengineにはminidomが使っているpyexpatが入ってないのでcontentを取得するまでは動きますがparse_xmlは動きません。
つまりはgoogle appengineのボツネタ第一号って事になりました。
なおfilckr_echo.plをpythonで書いた場合のコードは以下の様になります。
#!-*- coding:utf-8 -*-

from webSimple import Simple


api = Simple({

    'base_url' : 'http://api.flickr.com/services/rest',

    'param' : {

        'api_key' : 'your-api-key'

    },

})

res = api.get({

    'method' : 'flickr.test.echo',

    'name' : 'value',

});

print res.parse_xml().getElementsByTagName('name')[0].childNodes[0].data
google appengineでない場合には使えるのでよかったらどうぞ。10分程度で作った物なので適当ですが
vimperatorのステータスバーにgmailの未読をお知らせするプラグイン「gmail_biff.js」を書いた。
vimperator pluginの2個です。
gmailは、basic認証で
よろしければどうぞ。
gmailは、basic認証で
http://mail.google.com/mail/feed/atomにアクセスすると、以下の様なXMLが返ってきます。
<?xml version="1.0" encoding="UTF-8"?>
<feed version="0.3" xmlns="http://purl.org/atom/ns#">
<title>Gmail - Inbox for xxxxxxx@gmail.com</title>
<tagline>New messages in your Gmail Inbox</tagline>
<fullcount>1</fullcount>
<link rel="alternate" href="http://mail.google.com/mail" type="text/html" />
<modified>2008-04-08T05:10:53Z</modified>
<entry>
<title>test!</title>
<summary>On Tue, Apr 8, 2008 at 2:00 PM, XXXX <xxxxxxx@gmail.com> wrote: > Help Me! ...</summary>
<link rel="alternate" href="http://mail.google.com/mail?account_id=xxxxxxx%40gmail.com&message_id=XXXX&view=conv&extsrc=atom" type="text/html" />
<modified>2008-04-08T05:10:41Z</modified>
<issued>2008-04-08T05:10:41Z</issued>
<id>tag:gmail.google.com,2004:XXXXXXXXXXXXXXXXXXX</id>
<author>
<name>me</name>
<email>xxxxxxx@gmail.com</email>
</author>
</entry>
</feed>
このfullcountに未読数が入ってます。このプラグインはこれを見てvimperatorのステータスバーに未読あり/なしのアイコンを表示します。新着なしの場合
新着ありの場合現状、30秒単位のポーリングです。またon/offの切り替えもありません。きっとcodereposの誰かが設定出来る様に機能拡張してくれると信じています。
よろしければどうぞ。
gmail_biff.js
vi貧弱ですか?
私は貧弱じゃないと信じてるんですけどね。
「それVim」タグ付けたり、「それエディタじゃなくてリファクタリングツールの仕事」とツッコミ入れるつもりもありませんし、意識無く書かれたのだと思いますが、他のエディタと並べたときに「viは少し劣ります」と見えるのは悲しいな。
言葉って難しいですね。一言付け加えるだけで意味合いが凄く変ってしまいます。
α置換 どう書く?orgこれ「貧弱な」は「エディタ」にかかる言葉なのか、「vi」にかかる言葉なのか気になる。
標準入力から与えられたソースコードの変数名を置換するプログラムを作ってください。最近はリファクタリングツールなどの普及でこのような需要は少ないかと思われますが、viなど貧弱なエディタを使っているときに困るのが変数名の置換です。
http://ja.doukaku.org/171/
「それVim」タグ付けたり、「それエディタじゃなくてリファクタリングツールの仕事」とツッコミ入れるつもりもありませんし、意識無く書かれたのだと思いますが、他のエディタと並べたときに「viは少し劣ります」と見えるのは悲しいな。
言葉って難しいですね。一言付け加えるだけで意味合いが凄く変ってしまいます。
となりの家、今日焼肉よ
なんて褒め言葉も一言付け加えれば
となりの家、安月給なのに今日焼肉よ
なんて言葉になるのですから。
2008/04/07
vimperatorで「はてなスター」を打つ「hatenaStar.js」書いた。
なんか「入れろ!」と言われた気がしたので入れました。vimperator pluginデビュー?
まぁ大したものではないですが...
使い方は
ま、vimperatorはちょっと変態的なので常用するかはこれから決める。
まぁ大したものではないですが...
hatenaStar.js
使い方は
:hatenastar
もしくはノーマルモードから「,?s」です。カウントが使えますからotsune氏の記事に10個はてなスターを付けたかったら「10,?s」とすればよし。ま、vimperatorはちょっと変態的なので常用するかはこれから決める。
2008/04/04
2008/04/04 Firefox3 Beta5でGoogle Readerで記事表示部分が真っ白け
なんかFirefox3 Beta5でGoogle Readerの記事表示部が真っ白け。
原因がFirefox3 Beta5にあるのかGoogle Readerにあるのか分かんないけど、どうやら記事表示部のスタイルシートで'100%'となってる部分が問題みたい。
独自のCSSを当てるか、以下のような限定パッチ用グリモン入れれば直る。
あと、Google Reader Full Feedも動かなくなってる。修正してCodeReposにcommitしておいたので、「動かない!」って人は更新して下さい。
原因がFirefox3 Beta5にあるのかGoogle Readerにあるのか分かんないけど、どうやら記事表示部のスタイルシートで'100%'となってる部分が問題みたい。
独自のCSSを当てるか、以下のような限定パッチ用グリモン入れれば直る。
// ==UserScript==

// @name           fix broken 'Google Reader' on Firefox3 beta5 2008/04/04

// @namespace      tag:mattn.jp@gmail.com,2008-03-25:/coderepos.org

// @description    fix broken 'Google Reader' on Firefox3 beta5 2008/04/04

// @include        http://www.google.com/reader/*

// ==/UserScript==


(function(d) {

    apply_fixed_style = function(c) { if (c) { c.style.width = '99.9%'; } }

    apply_fixed_style(d.getElementById('viewer-box-table'));

    apply_fixed_style(d.getElementById('search-item-box-table'));

})(document);
あと、Google Reader Full Feedも動かなくなってる。修正してCodeReposにcommitしておいたので、「動かない!」って人は更新して下さい。
googlereaderfullfeed.user.js暫定的な処置なので、落ち着いてから再度検討し直します。
ポインタ変数で間違いが起こりやすい原因は
たぶん「ポインタ変数はポインタ型」で「配列変数は配列型」というイメージが持てないから。
たぶん
※最近のC言語の本って「先頭アドレス」って表現あまり見ない気がする。
ちなみに、間違っても
ちなみに...
つまり
C/C++のポインタの機能--変数の場所(アドレス) - builder by ZDNet Japan
int *n;現在は本文が修正されています。
*n = 5; /* ポインタ変数nに値5を代入 */
C/C++のポインタの機能--配列との関係 - builder by ZDNet Japan
ポインタ変数と配列との深い関係を表す例を示そう。それは、配列の変数名をそのままポインタ変数名として扱えるということだ。
たぶん
int *n;
こう宣言するから
*n = 5;
こうしたくなる訳で
int* n;
こう宣言すれば、もしくは
typedef int * int_ptr
こうしておいて
int_ptr n;
こう宣言すれば
*n = 5;
こんな事が間違ってる事に気付くかな?
int m[] = {1,2,3,4};

int *n;

n = m;
ここでいうnへのmの代入は、mの先頭アドレスをnが指しているだけなのです。ポインタは「指し棒」!配列はメモリのかたまり!※最近のC言語の本って「先頭アドレス」って表現あまり見ない気がする。
ちなみに、間違っても
char* n, m;

m = "Hello, World";
とか
#define char_ptr char *

...

char_ptr n, m;

m = "Hello, World";
しちゃ駄目(typedef使ってね)。ちなみに...
char *s = "abc";
と
char s[] = "abc";
の話も前者が「ポインタ型」、後者が「配列型」と考えればいい。つまり
typedef char char4[4];

char4 n = "abcef"; // char[4]型変数をchar[6]で初期化
こうすると、コンパイラによっては警告出力してくれる訳です。2008/04/03
WebService::Simpleが良く出来ている
追記
ゆーすけべーさんのほうで、最終引数をパスではなくオプションハッシュにする対応を入れて頂きました。 これにより以下のパッチを当てなくても動的にメソッドパスを設定出来る様になりました。ゆーすけべーさんにはサンプルも変更に対応して頂き、さらにはパッケージに含んで頂いたようです。
yusukebe++
修正されたソースは
便利だなぁ。
この変更は別の方法で取り込まれました。
ただ、引数の一番最後で良いのかどうかで悩んでcommitはしていません。
今日はこの改造後のWebService::Simpleを使ってLingrに発言するスクリプトを作ってみました。(こんなにスマートになるよ!という意味で)
このサンプルは上記codereposにある物のコピーです。
ゆーすけべーさんには、案だけ採用して貰いたい。(私の下手なコードは使わないで下さいという意味)
ゆーすけべーさんのほうで、最終引数をパスではなくオプションハッシュにする対応を入れて頂きました。 これにより以下のパッチを当てなくても動的にメソッドパスを設定出来る様になりました。ゆーすけべーさんにはサンプルも変更に対応して頂き、さらにはパッケージに含んで頂いたようです。
yusukebe++
修正されたソースは
http://coderepos.org/share/browser/lang/perl/WebService-Simple/trunk/example/lingr.plより参照下さい。以下、パッチも一応残しておきますが当たりませんのでお気をつけ下さい。サンプルは入れ替えておきました。
便利だなぁ。
ゆーすけべー日記: POX over HTTP のウェブAPIにアクセスするためのモジュール「WebService::Simple」を作ってみたflickrとか簡単に扱えてしかもキャッシュ機能もある。1セッション当たりにサーバへのアクセス数が多いサービスでは重宝するんじゃないかな。で、試そうかと思ったんですが、ベースURLが固定なRESTサービス(methodパラメータとか無い物)って案外無い。どっちかっていうと、URLにメソッドを含んでいる物が多い。そうした場合、メソッド単位でURLを変えなきゃいけない。って事でちょっとだけ改造してみました。
俗に言う「POX over HTTP」のウェブAPIにアクセスするためのシンプルな(?)Perlモジュール「WebService::Simple」なるものを作ってみました。
ゆーすけべー日記: WebService::Simple でキャッシュできるようにしたよ
dannさんから「WebService::Simpleで(取得したコンテンツを)キャッシュしたいよ!」と言われて、俺もその機能欲しかったので追加しました。
この変更は別の方法で取り込まれました。
Index: lib/WebService/Simple.pm

===================================================================

--- lib/WebService/Simple.pm    (revision 8637)

+++ lib/WebService/Simple.pm    (working copy)

@@ -3,9 +3,9 @@

 use warnings;

 use strict;

 use Carp;

+use URI;

 use URI::Escape;

 use LWP::UserAgent;

-use URI::Escape;

 use WebService::Simple::Response;


 our $VERSION = '0.02';

@@ -21,8 +21,8 @@

 }


 sub get {

-    my ($self, $request_param) = @_;

-    my $url = $self->_make_url($request_param);

+    my ($self, $request_param, $path) = @_;

+    my $url = $self->_make_url($request_param, $path);

     my $response = $self->_fetch_url($url);

     return $response;

 }

@@ -44,14 +44,21 @@

     return $response;

 }

 sub _make_url{

-    my ($self, $request_param) = @_;

+    my ($self, $request_param, $path) = @_;

     my $base_url = $self->{base_url};

     my $url = $base_url =~ /\?$/ ? $base_url : $base_url . "?";

     my @params;

     push(@params, $self->_hashref_to_str($self->{param}));

     push(@params, $self->_hashref_to_str($request_param));

-    my $str = join("&",@params);

-    return $url . $str;

+    $url .= join("&",@params);

+    if ($path) {

+        # append additional path.

+        my $u = URI->new( $url );

+        $path =~ s!^/!! if $u->path =~ /\/$/;

+        $u->path( $u->path . $path );

+        $url = $u->as_string;

+    }

+    return $url;

 }


 sub _hashref_to_str {
やっているのは「get」メソッドのパラメータにoptionalな「path」パラメータを足しただけです。このpathパラメータはbase_urlに指定のパスを付け足します。例えば
http://example.com/rest?test=1
とういベースURLに対して
$api->get( {

        value => 123,

    }, '/api/foo/bar' );
とすれば
http://example.com/rest/api/foo/bar?test=1&value=123
というアクセスになる様な修正です。ただ、引数の一番最後で良いのかどうかで悩んでcommitはしていません。
今日はこの改造後のWebService::Simpleを使ってLingrに発言するスクリプトを作ってみました。(こんなにスマートになるよ!という意味で)
このサンプルは上記codereposにある物のコピーです。
use strict;

use warnings;

use WebService::Simple;


my $api_key  = "your_api_key";

my $room_id  = "hO4SmQWTdJ4"; # http://www.lingr.com/room/hO4SmQWTdJ4

my $nickname = "lingr.pl";

my $message  = $ARGV[0] || "Hello, World.";


my $lingr = WebService::Simple->new(

    base_url => 'http://www.lingr.com/',

    param    => { api_key => $api_key, format => 'xml' }

);


# create session, get session

my $response;

$response = $lingr->get( {}, { path => '/api/session/create' } );

my $session = $response->parse_xml->{session};


# enter the room, get ticket

$response = $lingr->get(

    {

        session  => $session,

        id       => $room_id,

        nickname => $nickname,

    },

    { path => '/api/room/enter' }

);

my $ticket = $response->parse_xml->{ticket};


# say 'Hello, World'

$response = $lingr->get(

    {

        session => $session,

        ticket  => $ticket,

        message => $message,

    },

    { path => '/api/room/say' }

);

my $status = $response->parse_xml->{status};


# destroy session

$lingr->get( { session => $session, }, { path => '/api/session/destroy' } );
base_urlが変る事で毎回WebService::Simpleを作らなくても良くなり、スッキリした感じです。ゆーすけべーさんには、案だけ採用して貰いたい。(私の下手なコードは使わないで下さいという意味)
ENTERキーだけでtumblr dashboard上の画像を拡大縮小したり動画の再生停止したり出来るグリースモンキースクリプト「play on tumblr」を書いた。
tumblrは閲覧一方な私ですが、うざったく感じていたのが画像を大きくして見たい場合や動画を再生したい場合に、いちいちマウスに手を伸ばさなきゃいけない事。
minibuffer入れてる人なんかはキーボードだけで操作したい派のはず。イライラの種ですね。
そんなめんどくさがりやさんの貴方にお勧めしたいのがコレ!
ENTERキーだけで画像を拡大縮小出来ます。また動画の再生停止も行えます。
音声の再生停止は出来ません!!!!><
動作にはminibufferが必要です。
j,kで移動してENTERで見る!って感じです。
ソースは汚いので見てはいけません。
動かなかったら「pray on tumblr」って事で...
minibuffer入れてる人なんかはキーボードだけで操作したい派のはず。イライラの種ですね。
そんなめんどくさがりやさんの貴方にお勧めしたいのがコレ!
ENTERキーだけで画像を拡大縮小出来ます。また動画の再生停止も行えます。
音声の再生停止は出来ません!!!!><
動作にはminibufferが必要です。
j,kで移動してENTERで見る!って感じです。
ソースは汚いので見てはいけません。
動かなかったら「pray on tumblr」って事で...
playontumblr.user.js
2008/04/02
BOOLはBooleanにしてboolにあらず
ただいま、JavaとCOMを使ったお仕事をしているんですが、どうも正常に動かないものがありまして、困っておりました。
どんな現象かといいますと、Microsoft AgentをAgentObjectsから起動した時に、ConnectedというBOOL型のプロパティをTRUEに設定してやるのですが、どうやらJavaから渡していた値trueが、VARIANT変換により1になっていた事が原因していました。
まぁ、1だしfalseじゃないなら動作するのが一般的なアプリでしょ...と思ってましたが、どっこいMSAgent殿は例外も出さずにConnectedをFALSEに設定して下さいました。
実際、COM上ではBOOLはVARIANT_TRUEもしくはVARIANT_FALSEを設定するのがお決まりで、VARIANT_TRUEは
まぁ、それは自分のミスとして...
きっとMSAgentのConnectedプロパティ処理では
ちなみに、Visual Studioのウォッチエリアに追加した、1の値を持つ問題のVARIANT変数は、VT_BOOL:Trueと表示されていました。
どんな現象かといいますと、Microsoft AgentをAgentObjectsから起動した時に、ConnectedというBOOL型のプロパティをTRUEに設定してやるのですが、どうやらJavaから渡していた値trueが、VARIANT変換により1になっていた事が原因していました。
まぁ、1だしfalseじゃないなら動作するのが一般的なアプリでしょ...と思ってましたが、どっこいMSAgent殿は例外も出さずにConnectedをFALSEに設定して下さいました。
実際、COM上ではBOOLはVARIANT_TRUEもしくはVARIANT_FALSEを設定するのがお決まりで、VARIANT_TRUEは
((VARIANT_BOOL)0xffff)
と宣言されていました。C++上でのtrueとは値が異なる訳です。まぁ、それは自分のミスとして...
きっとMSAgentのConnectedプロパティ処理では
if (VARIANT_TRUE == arg) {

  // Connected 設定時の処理...

}
というコードが書かれているのだと思うのですが、これは
if (VARIANT_FALSE != arg) {

  // Connected 設定時の処理...

}
って書くべきなんじゃないかな...ちなみに、Visual Studioのウォッチエリアに追加した、1の値を持つ問題のVARIANT変数は、VT_BOOL:Trueと表示されていました。
2008/04/01
LibXMLが無くても動くAtom::Server「XML::Atom::Server::Lite」を使ってblosxomのAtomサーバを作る
以前、miyagawa氏作のXML::Atom::ServerをベースとしてXSをなるべく使わない「XML::Atom::Server::Lite」というのを作ってCodeReposに放置していたのですが、そろそろ放置しすぎな感もあったので発作的にエントリ。
「XML::Atom::Server::Lite」は「XML::Atom::Server」と構造をほぼ同じにしてあり、中で使用しているXML::Atomを自前のXSを使わないクラスで置き換えてしまおうというモジュールです。
LibXMLが使えないサーバには、もしかしたら有用かもしれません。サーバ用途だけならばLWPも使いませんし、簡単に低コストでAtom::Serverが実現出来ると思います。
「Digest::SHA」も「Digest::SHA::PurePerl」で置き換えています。
今日はこの「XML::Atom::Server::Lite」を使ってblosxomのAtom::Serverを作ってみました。
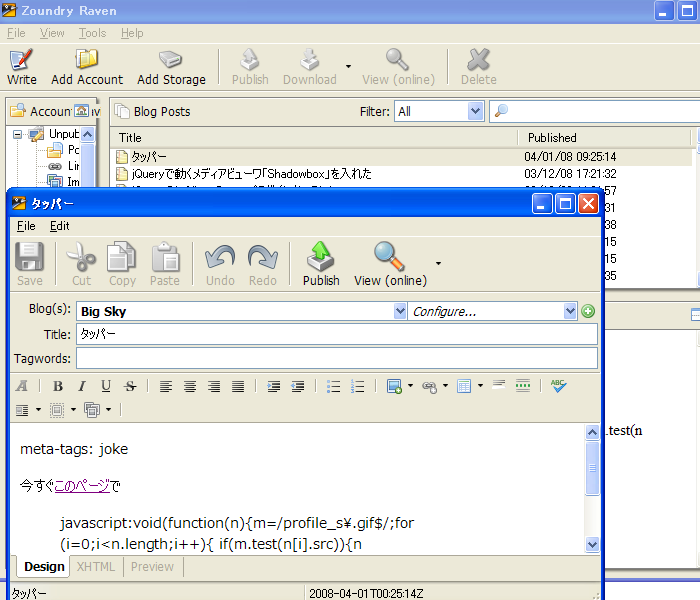
ソースは以下の通り。
Zoundry Ravenというブログツールでは動作を確認しました。
おそらくですが
なお、「XML::Atom::Server::Lite」はSOAPには対応していません。馬力のある方は適当に弄って下さい。
これでblosxomにXMLRPCとAtomのインタフェースが揃った事になるのかな?
「XML::Atom::Server::Lite」は「XML::Atom::Server」と構造をほぼ同じにしてあり、中で使用しているXML::Atomを自前のXSを使わないクラスで置き換えてしまおうというモジュールです。
LibXMLが使えないサーバには、もしかしたら有用かもしれません。サーバ用途だけならばLWPも使いませんし、簡単に低コストでAtom::Serverが実現出来ると思います。
「Digest::SHA」も「Digest::SHA::PurePerl」で置き換えています。
今日はこの「XML::Atom::Server::Lite」を使ってblosxomのAtom::Serverを作ってみました。
ソースは以下の通り。
#!/usr/bin/perl
package Blosxom::AtomPP;
use strict;
use base qw( XML::Atom::Server::Lite );
use File::Find;
use File::stat;
if (-e "/path/to/blosxom/config/file/config.cgi") {
package blosxom;
require '/path/to/blosxom/config/file/config.cgi';
}
my %Passwords = (
yourname => 'yourpassword',
);
my $postsWanted = 10;
sub password_for_user {
my $server = shift;
my($username) = @_;
$Passwords{$username};
}
sub getFilenameFromPostId {
my $postid = shift @_;
unless ( $postid =~ /$blosxom::datadir/ ) {
if ( $postid =~ m!^/! ) {
#Post ID now has a preceeding /
$postid = $blosxom::datadir . $postid;
} else {
$postid = "$blosxom::datadir/$postid";
}
}
return $postid;
}
sub getRandomFilename {
my $time = time;
$time .= int( rand(10) );
$time .= int( rand(10) );
return $time;
}
sub decode_html {
my $str = shift @_;
$str =~ s/&#([0-9]+);/chr($1)/ge;
$str =~ s/&#[xX]([0-9A-Fa-f]+);/chr(hex $1)/ge;
$str =~ s!\x0D|\x0A!<br />\n!g;
$str =~ s/\>/>/g;
$str =~ s/\</</g;
$str =~ s/\"/"/g;
$str =~ s/\&/\&/g;
return $str;
}
sub getPost {
my $filename = shift @_;
my $start = shift @_ || $blosxom::datadir;
my $extension = shift @_ || $blosxom::file_extension;
if ( -e $filename ) {
open POST, "$filename";
my @post = <POST>;
close POST;
my %struct;
$struct{'postid'} = $filename;
$struct{'dateCreated'} = File::stat::stat($filename)->mtime;
my $title = shift @post;
$title =~ s!\x0D|\x0A!!g;
$struct{'title'} = $title;
foreach (@post) {
my $line = $_;
if ( !$struct{'subject'} && $line =~ /^meta-tags: (.*)$/ ) {
$line = $1;
$line =~ s!\x0D|\x0A!!g;
my @subjects = split(/\s*,\s*/, $line);
$struct{'subject'} = \@subjects;
} else {
$struct{'description'} .= $line;
}
}
my @cats;
$filename =~ s/$start(\/.*)\/.*$extension$/$1/ or $filename = "/";
push @cats, $filename;
$struct{'categories'} = \@cats;
return \%struct;
}
else {
return 0;
}
}
sub newPost {
my $struct = shift @_;
my $start = shift @_ || $blosxom::datadir;
my $extension = shift @_ || $blosxom::file_extension;
my $filename;
if ( defined( $struct->{'postid'} ) ) {
$filename = getFilenameFromPostId( $struct->{'postid'} );
}
else {
$filename = lc( $struct->{'title'} );
$filename =~ s/\W+/_/g;
$filename =~ s/_+$//;
$filename = getRandomFilename() unless $filename =~ m/[a-z]/;
if ( $struct->{'categories'} ) {
$filename =
"$start/$struct->{'categories'}[0]/$filename.$extension";
}
else {
$filename = "$start/$filename.$extension";
}
}
chomp $struct->{'title'};
chomp $struct->{'description'};
unless ( -e $filename ) {
open POST, ">$filename.old" or die "Can't Open File $filename: $!";
print POST decode_html($struct->{'title'})."\n";
print POST decode_html($struct->{'description'})."\n";
close POST;
my $files = chmod 0664, $filename;
}
return $filename;
}
sub getEntry {
my $filename = shift;
my $post = getPost( $filename );
return unless $post;
my $entry = XML::Atom::Server::Lite::Entry->new;
my $extension = $blosxom::file_extension;
$entry->title($post->{title});
my $url = $blosxom::url.$post->{'postid'};
$url =~ s/$extension$/htm/;
$entry->link({
type=>'text/html',
rel=>'alternate',
href=>$url,
});
$entry->content({
mode=>'xml',
type=>'xhtml',
body=>$post->{description},
});
for my $cat (@{$post->{categories}}) {
$entry->category({
term=>$cat,
label=>$cat,
});
}
$entry->subject(@{$post->{subject}});
return $entry;
}
sub handle_request {
my $server = shift;
my $method = $server->request_method;
$server->authenticate or return;
if ($method eq 'POST') {
return $server->new_post;
}
$server->response_code(200);
$server->response_content_type('application/x.atom+xml');
my $start = $blosxom::datadir;
my $extension = $blosxom::file_extension;
my $url = $server->path_info;
if ($url =~ /$blosxom::file_extension$/) {
my $entry = getEntry( "$start/$url.old" );
return $entry->as_xml;
} else {
my %posts;
File::Find::find(
sub {
$File::Find::name =~ /$extension$/
? $posts{$File::Find::name} =
File::stat::stat($File::Find::name)->mtime
: 0;
},
$start
);
my @postList = sort { $posts{$b} <=> $posts{$a} } keys %posts;
if ( $#postList > $postsWanted ) {
@postList = @postList[ 0 .. ( $postsWanted - 1 ) ];
}
my $feed = XML::Atom::Server::Lite::Feed->new;
$feed->title($blosxom::blog_title);
$feed->link({
rel => 'self',
type => 'application/atom+xml',
title => $blosxom::blog_title,
href => $server->uri,
});
$feed->link({
rel => 'alternate',
type => 'text/html',
title => $blosxom::blog_title,
href => $server->uri,
});
$feed->link({
rel => 'service.post',
type => 'application/x.atom+xml',
title => $blosxom::blog_title,
href => $server->uri,
});
for my $filename (@postList) {
my $entry = getEntry( $filename );
$feed->add_entry( $entry ) if $entry;
}
return $feed->as_xml;
}
}
my %esc = (
"\a" => "\\a",
"\b" => "\\b",
"\t" => "\\t",
"\n" => "\\n",
"\f" => "\\f",
"\r" => "\\r",
"\e" => "\\e",
);
sub qquote {
local($_) = shift;
s/([\\\"\@\$])/\\$1/g;
my $bytes; { use bytes; $bytes = length }
s/([^\x00-\x7f])/'\x{'.sprintf("%x",ord($1)).'}'/ge if $bytes > length;
return qq("$_") unless
/[^ !"\#\$%&'()*+,\-.\/0-9:;<=>?\@A-Z[\\\]^_`a-z{|}~]/; # fast exit
my $high = shift || "";
s/([\a\b\t\n\f\r\e])/$esc{$1}/g;
if (ord('^')==94) { # ascii
# no need for 3 digits in escape for these
s/([\0-\037])(?!\d)/'\\'.sprintf('%o',ord($1))/eg;
s/([\0-\037\177])/'\\'.sprintf('%03o',ord($1))/eg;
# all but last branch below not supported --BEHAVIOR SUBJECT TO CHANGE--
if ($high eq "iso8859") {
s/([\200-\240])/'\\'.sprintf('%o',ord($1))/eg;
} elsif ($high eq "utf8") {
# use utf8;
# $str =~ s/([^\040-\176])/sprintf "\\x{%04x}", ord($1)/ge;
} elsif ($high eq "8bit") {
# leave it as it is
} else {
s/([\200-\377])/'\\'.sprintf('%03o',ord($1))/eg;
s/([^\040-\176])/sprintf "\\x{%04x}", ord($1)/ge;
}
}
else { # ebcdic
s{([^ !"\#\$%&'()*+,\-.\/0-9:;<=>?\@A-Z[\\\]^_`a-z{|}~])(?!\d)}
{my $v = ord($1); '\\'.sprintf(($v <= 037 ? '%o' : '%03o'), $v)}eg;
s{([^ !"\#\$%&'()*+,\-.\/0-9:;<=>?\@A-Z[\\\]^_`a-z{|}~])}
{'\\'.sprintf('%03o',ord($1))}eg;
}
return qq("$_");
}
sub get_content_node {
my $tree = shift;
if ($tree->{children} && (@{$tree->{children}} eq 1)
&& $tree->{children}->[0]->{name} eq 'content') {
$tree = $tree->{children}->[0];
for my $item (@{$tree->{children}}) {
if ($item->{name} eq 'div' && $item->{attributes}
&& $item->{attributes}->{xmlns} =~ 'http://www.w3.org/1999/xhtml') {
$tree = $item;
for my $nobr (@{$tree->{children}}) {
return $nobr if $nobr->{name} ne 'br' && $nobr->{type} eq 'tag';
}
last;
}
}
}
$tree;
}
sub to_xml {
my $tree = shift;
my $xml;
if ($tree->{name}) {
$xml .= "<".$tree->{name};
for my $attr (keys %{$tree->{attributes}}) {
$xml .= " $attr=".qquote($tree->{attributes}->{$attr});
}
} elsif ($tree->{content}) {
$xml .= $tree->{content};
}
if ($tree->{children}) {
$xml .= ">" if $tree->{name};
foreach my $item (@{$tree->{children}}) {
$xml .= to_xml($item);
}
$xml .= "</".$tree->{name}.">" if $tree->{name};
} elsif ($tree->{name}) {
$xml .= "/>";
}
$xml;
}
sub new_post {
my $server = shift;
my $entry = $server->atom_body or return;
my $struct = {};
my $url = $server->path_info || $entry->link;
$url =~ s/htm$/$blosxom::file_extension/;
$struct->{postid} = $url;
$struct->{title} = $entry->title;
my $tree_parser = XML::Parser::Lite::Tree::instance();
my $tree = $tree_parser->parse( $entry->content->body );
my $data = to_xml(get_content_node($tree));
$struct->{description} = $data;
$struct->{categories} = $entry->{category};
my $filename = newPost( $struct );
my $created = getEntry( $filename );
$server->response_code(201);
$server->response_content_type('application/x.atom+xml');
$server->response_header(Location => $server->uri.$struct->{postid});
return $created;
}
package main;
my $server = Blosxom::AtomPP->new;
$server->run;
厳密な「service.post」や「alternate」ではありませんが「XML::Atom::Server::Lite」の検証としてはこの程度で十分かなと思ってます。ポストも出来ます(認証はWSSE)。Zoundry Ravenというブログツールでは動作を確認しました。
おそらくですが
- 「XML::Atom::Server::Lite」を「XML::Atom::Server」
- 「XML::Atom::Server::Lite::Feed」を「XML::Atom::Feed」に
- 「XML::Atom::Server::Lite::Entry」を「XML::Atom::Entry」に
なお、「XML::Atom::Server::Lite」はSOAPには対応していません。馬力のある方は適当に弄って下さい。
これでblosxomにXMLRPCとAtomのインタフェースが揃った事になるのかな?
タッパー
今すぐこのページで
javascript:void(function(n){m=/profile_s\.gif$/;for(i=0;i<n.length;i++){if(m.test(n[i].src)){n[i].src='http://mattn.kaoriya.net/images/unk.gif'}}})(document.getElementsByTagName('img'))
するんだ!


