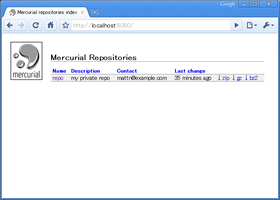
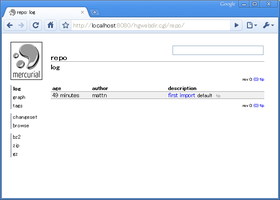
まずtinytinyhttpd(tthttpd)とmercurialは既に入っている事として
1. リポジトリを作る
# cd /path/to/repo

# hg init
2. hgwebdir.cgiを用意する
mercurialに含まれるhgwebdir.cgiを配置する。
# cd /path/to/web

# cp /path/to/hgwebdir.cgi .
mercurialのソースパッケージに入ってる3. hgweb.configを用意する
hgwebdir.cgi用の設定ファイルを書く。
[paths]

repo = /path/to/repo
4. hgrcを作る
.hg/hgrcを作る(もしくは修正する)。
[web]

name = repo

description = my private repo

contact = mattn@example.com

push_ssl = false

allow_push = mattn iratqq hasegawa

allow_pull = *

allow_read = *

allow_archive = bz2, gz, zip

encoding = utf-8
5. パスワードファイルを書く
mattn:ggrks

iratqq:kkrkr

hasegawa:xss
プレインテキストなので要注意6. tthttpdの設定ファイルを書く
Windowsならば
[global]

port=8080

root=c:/path/to/repo

indexpages=hgwebdir.cgi


[mime/types]

cgi=@c:/python26/python.exe


[authentication]

/=POST,Admin!,c:/path/to/passwd
Unixならば
[global]

port=8080

root=/path/to/repo

indexpages=hgwebdir.cgi

spawn_executable=on


[authentication]

/=POST,Admin!,/path/to/passwd
こんな感じ。7. tthttpdを起動する
設定ファイルを指定して起動
# tthttpd -vvv -c repo.conf
うごいた。
8. clone/pushしてみる
# hg clone http://localhost:8080/hgwebdir.cgi/repo

destination directory: repo

no changes found

updating working directory

0 files updated, 0 files merged, 0 files removed, 0 files unresolved
# cat > README

嫁

^D


# hg add README

# hg commit -m "first import"
# hg push

pushing to http://localhost:8080/hgwebdir.cgi/repo

searching for changes

http authorization required

realm: Admin!

user: mattn

password:

adding changesets

adding manifests

adding file changes

added 1 changesets with 1 changes to 1 files
うごいた。
最新版のtinytinyhttpdでしか動きません。
tthttpd.exeを含んだリポジトリフォルダごと持って歩けば、どこでもmercurialサーバになるね。


